YES!!! I WANT THESE! isn’t just a catchy phrase, it’s the feeling I get when I discover those little game-changers that transform my home from cluttered chaos to calm sanctuary. Do you ever find yourself tripping over shoes by the front door, or endlessly searching for that one essential kitchen gadget? I know I do! Imagine walking into a space where everything has its designated spot, where the surfaces are clear, and a sense of effortless order greets you. That’s the magic we’re talking about. And the best part? These solutions are surprisingly affordable, often costing less than a fancy coffee and taking mere minutes to implement. In this article, I’ll share my absolute favorite finds that tackle everyday frustrations head-on, helping you create that perfectly organized, beautiful home you’ve been dreaming of. Get ready to feel inspired!
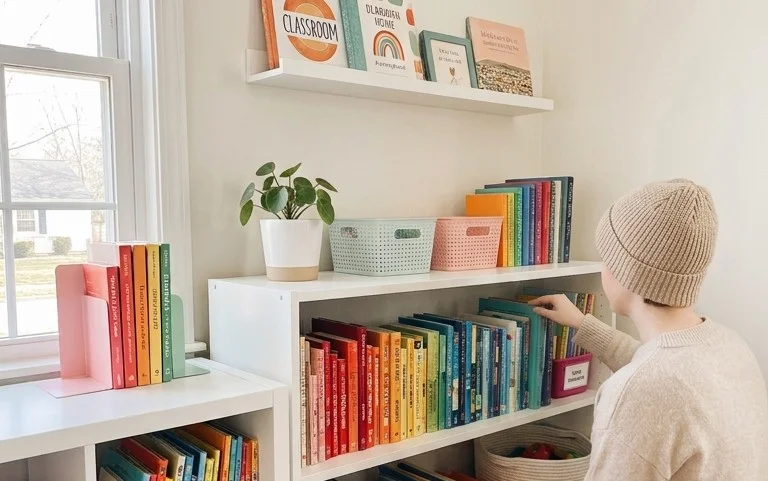
You know that feeling? The one where you stumble across a home decor or organization idea that just *clicks*? It’s like a little spark ignites, and suddenly your brain is buzzing with possibilities. For me, lately, that spark has been the humble yet mighty shelf. Not just any shelf, though. I’m talking about those sleek, minimalist floating shelves that magically seem to hold all your beloved treasures without a visible bracket in sight. They look effortlessly chic, they maximize vertical space, and honestly, they just make my heart sing. So, YES!!! I WANT THESE! And I want to share how you can get them too.
The Allure of the Floating Shelf: Why I’m Obsessed
Floating shelves are the unsung heroes of stylish storage. They bring a sense of airy lightness to a room, decluttering surfaces and drawing the eye upward. Unlike bulky bookcases or traditional shelves with visible supports, they create a clean, modern aesthetic that works in almost any space. Whether you’re displaying art, housing your book collection, or organizing your kitchen essentials, floating shelves offer a beautiful and functional solution. They can transform a blank wall into a focal point and are surprisingly versatile.
What You Need and Roughly What It Costs
Let’s get down to the nitty-gritty. To achieve this floating shelf dream, you’ll need a few things.
* **Floating Shelf Kits:** These are readily available at hardware stores (think Home Depot, Lowe’s) and online retailers (Amazon, Wayfair). They typically include the shelf itself, the internal mounting bracket, and all the necessary screws and wall anchors. For a decent quality shelf, expect to pay anywhere from $30 to $80 per shelf, depending on the size, material (solid wood will be more expensive than MDF or laminate), and brand. For this guide, let’s assume we’re buying two 36-inch shelves, so budgeting around $80 to $160 for the shelves themselves is a good starting point.
* **Stud Finder:** This is crucial for securely mounting your shelves. You can find a basic electronic stud finder for around $15 to $30.
* **Level:** A good quality level (24-inch is a common and useful size) will ensure your shelves are perfectly straight. Expect to spend $10 to $20.
* **Drill and Drill Bits:** If you don’t already own one, a basic cordless drill is a worthwhile investment for any DIYer. Around $50 to $100 for a decent one. You’ll also need drill bits that are slightly larger than your screws and anchors.
* **Pencil:** For marking.
* **Measuring Tape:** Essential for planning.
* **Optional: Spackle/Paint:** If you need to patch any small holes from previous decor or want to touch up the wall. A small tub of spackle is under $5, and a small can of paint can be around $10-$15.
So, for two moderately sized floating shelves, you’re looking at a ballpark cost of $155 to $305, plus the cost of any tools you might need to purchase.
How to Measure and Plan Before You Start
This is where the magic happens – the planning phase. Rushing this will lead to frustration.
1. **Assess Your Space:** Look at the wall you envision for your shelves. What’s the total width? How much height do you have? Are there any windows, doors, or outlets that will affect placement?
2. **Determine Shelf Size and Quantity:** For a 36-inch shelf, I recommend leaving at least 24 inches of space between shelves to avoid a cluttered look and allow for taller items. If you have an 8-foot (96 inches) wall, you could comfortably fit two 36-inch shelves with ample breathing room. Consider the weight of the items you plan to display. Lighter decorative items are fine for most shelves, but if you’re planning on heavy books, you’ll need to ensure you hit at least two studs per shelf.
3. **Mark Your Desired Height:** Use your measuring tape and pencil to lightly mark where you want the *bottom* of your shelves to be. This is easier than marking the center or top. Measure from the floor or another established point (like the top of a dresser or sofa) to ensure symmetry. For example, I like my bottom shelf to be about 5 feet from the floor.
4. **Check for Studs:** This is non-negotiable for a secure installation. Use your stud finder to locate the wall studs within the area where your shelves will go. Mark the center of each stud with your pencil. Most standard walls have studs spaced 16 inches apart. For a 36-inch shelf, you absolutely want to hit at least two studs. If your desired shelf length falls between studs, you *must* use heavy-duty drywall anchors specifically designed for the weight of your intended items. The mounting brackets that come with your floating shelves will often indicate how many studs are recommended.
### The Step-by-Step Installation: A Clear Walkthrough
Now that we’ve planned, it’s time to get our hands dirty!
1. **Locate and Mark Studs:** Refer to your earlier markings. Hold the mounting bracket that comes with your shelf against the wall at your desired height, ensuring it’s centered over at least two wall studs. Use your level to make sure the bracket is perfectly straight. Mark the screw hole locations on the wall with your pencil. If you can’t hit two studs, mark where you *will* use heavy-duty drywall anchors.
2. **Drill Pilot Holes:** Using a drill bit that’s slightly smaller than the screws you’ll be using, drill pilot holes at your marked locations. If you are using drywall anchors, follow the anchor manufacturer’s instructions for hole size and installation.
3. **Install the Mounting Bracket:** Screw the mounting bracket firmly into the wall studs using the provided screws. If you are using drywall anchors, insert them into the wall and then screw the bracket into the anchors. Use your level again to ensure the bracket is perfectly plumb and level before tightening all screws completely. This bracket is the backbone of your shelf!
4. **Slide the Shelf On:** Most floating shelves have a hollow back with prongs or a channel that slides over the mounting bracket. Carefully slide the shelf onto the bracket, pushing it flush against the wall.
5. **Secure the Shelf (If Applicable):** Some shelves have small set screws on the underside that you tighten to secure the shelf to the bracket. Check your specific shelf’s instructions. If yours doesn’t have them, ensure the fit is snug and the bracket is secure.
6. **Repeat for Additional Shelves:** If you’re installing multiple shelves, repeat steps 1-5, using your measurements and level to ensure consistent spacing and alignment.
Adapting for Small Spaces or Rentals
Living in a small apartment or a rental where drilling is a no-go? Don’t despair! You can still enjoy the beauty of floating shelves.
* **Strong Adhesive Hooks and Strips:** For very lightweight decorative items (think small framed photos, air plants), you can explore heavy-duty adhesive solutions like Command strips specifically rated for shelving or picture hanging. These are ideal for renters. You’ll need to carefully follow the weight limits.
* **Tension Rod Shelving:** For a truly drill-free option, consider tension rod shelves that sit between two walls or within a cabinet opening. These are often less aesthetically pleasing than traditional floating shelves but offer a functional solution.
* **Freestanding Shelf Units:** If you can’t mount anything, a stylish freestanding shelf unit or étagère can offer a similar vertical storage solution without any wall modifications.
### Styling Notes: Color, Texture, and Placement
Once your shelves are up, the fun part begins!
* **Color Palette:** I love a neutral palette for my shelves. Whites, creams, natural wood tones, and black create a sophisticated backdrop for your items. If your room has a bolder accent color, you can echo that with a few decorative pieces on the shelves.
* **Texture is Key:** Mix and match textures to add depth and interest. Think smooth ceramic vases, rough-hewn wooden bowls, soft woven baskets, and the matte finish of books.
* **The Art of Placement:** Don’t overcrowd your shelves! This is the fastest way to make them look messy. Aim for an asymmetrical, layered look. Place larger items towards the back and smaller items in front. Group similar items together. Leave some negative space – the empty areas are just as important as the filled ones for a balanced look. Consider the visual weight of your items. A large book can balance a few smaller decorative objects. I like to place my favorite books on one side, a potted plant or two, and then some artfully arranged decorative pieces.
### Keeping It Tidy After Week One
The initial thrill of new shelves can sometimes fade into a cluttered reality. Here’s how to keep them looking magazine-worthy:
* **The “One In, One Out” Rule:** For decorative items, try to adopt a “one in, one out” approach. When you bring something new home, find something else to donate or repurpose.
* **Designated Homes:** Even on shelves, assign “homes” to your items. This vase always sits here, this stack of books goes here. This helps maintain order.
* **Regular (Quick) Declutter:** Set a reminder for once a week for a quick 5-minute shelf tidy. Straighten books, dust items, and remove anything that has crept onto the shelf that doesn’t belong.
* **Embrace the Edit:** Periodically, step back and look at your shelves with a critical eye. Do you still love everything on them? Is anything serving a purpose other than collecting dust? Be brave and edit ruthlessly.
### Mistakes That Make This Fail
Even the most stylish shelves can go wrong. Here are the common pitfalls to avoid:
* **Not Hitting Studs:** This is the biggest one. Overloading shelves not secured into studs is a recipe for disaster and potential damage to your wall.
* **Overcrowding:** Too many items make shelves look cluttered, chaotic, and heavy. Less is truly more.
* **Poor Placement:** Shelves that are too high, too low, or too close together can feel awkward and impractical.
* **Ignoring Weight Limits:** Always be mindful of the weight capacity of your shelves and anchors, especially if you plan to store heavy items like books.
* **Forgetting the Level:** Crooked shelves are the quickest way to undermine the clean aesthetic.
Floating shelves have truly revolutionized how I think about storage and display. They are a fantastic way to inject style and organization into any room. So, go forth, measure, plan, and get ready to say “YES!!!” to your own beautiful floating shelves!
Conclusion
See? It’s not about a complete overhaul, but the profound difference a few smart home decor and organization choices can make to your everyday life. Imagine the joy of walking into a space that feels calm and functional, where everything has its place. The small wins add up to big improvements in your mood and productivity.
Ready to start your journey to a more beautiful and organized home? Your smallest first step could be as simple as decluttering one drawer or shelf today. For a quick living room refresh, consider adding a stylish storage basket. On a tighter budget, a DIY wall organizer can work wonders in a kitchen. Don’t stop here; explore more inspiring ideas and transform your living space one thoughtful step at a time!