Cheap and easy DIY Pottery Barn inspired basket tray tutorials are a game-changer for conquering that everyday clutter chaos! You know the feeling – remotes lost in the sofa abyss, mail piling up on the counter, keys mysteriously vanishing. If your coffee table or entryway often looks like a Bermuda Triangle for small items, this project is for you! Imagine a beautifully styled, woven tray, effortlessly corralling your essentials while adding a touch of warmth and sophistication. For just a few dollars and about an hour of your time, you can create a stunning piece that looks like it came straight from a high-end home decor store. In this tutorial, I’ll walk you through exactly how to achieve that chic Pottery Barn look with simple materials and straightforward steps, so you can finally bring a sense of calm and order to your space.
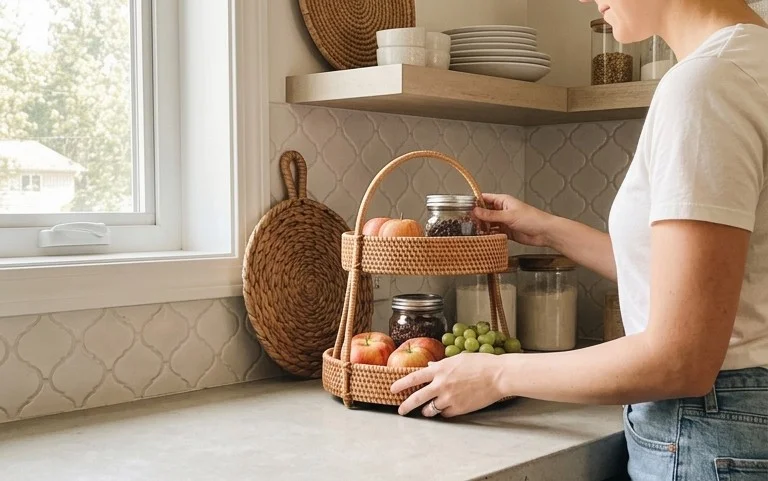
Chic Storage on a Dime: Your Pottery Barn Inspired DIY Basket Tray
One of the things I adore most about Pottery Barn is their effortlessly chic approach to home decor, especially their beautiful woven baskets and trays. They instantly add warmth, texture, and a touch of curated style to any space. However, that signature style often comes with a hefty price tag. For a long time, I’d eye those gorgeous basket trays, wishing I could replicate their look without breaking the bank. Then, it hit me: why not DIY? With a few simple materials and a bit of patience, you can create a stunning basket tray that’s practically indistinguishable from the high-end versions, but at a fraction of the cost. This project is incredibly forgiving, perfect for beginners, and adaptable to any space. Let’s get started!
The Allure of the Basket Tray
Basket trays are the unsung heroes of organization. They’re versatile enough to corral remotes on a coffee table, display decorative items in an entryway, organize toiletries on a bathroom counter, or even serve as a stylish base for a collection of plants. Their natural textures – think rattan, seagrass, or wicker – bring an organic element into your home, softening modern lines and adding depth. The beauty of a DIY version is that you can customize the size, shape, and even the colour to perfectly suit your needs and existing decor.
What You’ll Need & Roughly What It Costs
The beauty of this project lies in its affordability. The core components are readily available and inexpensive.
Here’s a breakdown of what you’ll need and an estimated cost:
* **A Flat, Sturdy Base:** This could be a piece of thick cardboard (like from an appliance box or multiple layers of cereal boxes glued together), a thin piece of plywood (around 1/4 inch or 6mm thick), or even a pre-made wooden tray base.
* *Cost:* Cardboard: Free (scavenge!) to $5. Plywood: $10-$20 for a small sheet. Wooden tray base: $5-$15 from a craft store.
* **Woven Rope or Cord:** This is what gives your tray its basket-like texture. Natural materials like jute, seagrass, or rattan cord work wonderfully. Synthetic alternatives are also available and can be very durable. Aim for a thickness of about 1/4 inch to 1/2 inch (6mm-12mm). You’ll need a good amount, depending on the size of your tray.
* *Quantity:* For a tray measuring roughly 12 inches by 18 inches (30cm x 45cm) with multiple wraps, you might need 50-100 yards (45-90 meters) of rope.
* *Cost:* $15-$40 depending on the material and quantity. Jute is generally the most budget-friendly.
* **Hot Glue Gun and Glue Sticks:** This is your primary adhesive. You’ll need a decent supply of glue sticks.
* *Cost:* Glue gun: $10-$25. Glue sticks: $5-$10 for a pack.
* **Scissors or a Craft Knife:** For cutting the rope.
* *Cost:* Already in your toolkit, or $5-$10.
* **Measuring Tape or Ruler:** Essential for planning.
* *Cost:* Already in your toolkit.
* **Optional: Paint or Stain:** If you want to colour your tray. Water-based acrylic paints or wood stains work well.
* *Cost:* $5-$15 per can.
* **Optional: Sealant:** To protect the finished tray, especially if you plan to use it in a high-traffic area. A matte or satin spray sealant is a good choice.
* *Cost:* $5-$10 per can.
Total Estimated Cost: $35 – $80, depending on your material choices and if you already own some of the tools. This is a significant saving compared to retail prices!
Measuring and Planning Your Perfect Tray
Before you even think about gluing, a little planning goes a long way.
1. **Determine the Size:** What is the intended purpose of your tray? Measure the space where it will live or the items it needs to hold. For example, if it’s for a coffee table, you might want it to be around 12 inches by 18 inches (30cm x 45cm). For an entryway, perhaps 10 inches by 14 inches (25cm x 35cm).
2. **Choose Your Base Shape:** Most basket trays are rectangular, but you can certainly adapt this to a square or even an oval if you’re feeling adventurous.
3. **Cut Your Base:** Once you have your dimensions, carefully cut your chosen base material to size. If using cardboard, ensure you have at least 2-3 layers glued together for sturdiness. For plywood, cut precisely to your desired shape.
4. **Plan Your Sides:** Decide how high you want the sides of your basket tray to be. Around 2-3 inches (5cm-7.5cm) is a good starting point. Mark this height on your base or cut strips of cardboard/thin wood if you’re adding separate side pieces.
### The Step-by-Step DIY Process: Bringing Your Basket Tray to Life
Now for the fun part! This is where your vision starts to take shape.
1. **Prepare Your Base:** Ensure your base is clean, dry, and perfectly flat. If you’re using plywood, you might want to lightly sand the edges. If you’re painting or staining your base material before adding the rope, do it now and let it dry completely.
2. **Start Gluing the Rope:** Begin at one edge of your base. Apply a line of hot glue about 1/2 inch (1.25cm) in from the edge. Immediately press the end of your rope firmly into the glue. Hold until it’s secure.
3. **Coil and Glue:** Apply another line of hot glue adjacent to the first line of rope, slightly overlapping it. Begin coiling the rope tightly around the base, pressing it into the glue as you go. Work in small sections of about 3-4 inches (7.5-10cm) at a time so the glue doesn’t dry before you can attach the rope.
4. **Continue Around the Perimeter:** Keep coiling and gluing the rope, ensuring it’s always snug against the previous coil and as close to the edge of the base as possible. This forms the bottom of your tray.
5. **Building the Sides:** Once you’ve completed the entire base, it’s time to build up the sides. Apply a bead of hot glue along the outer edge of the last coil of rope. Begin coiling the rope upwards, again pressing it firmly into the glue. You can either coil directly onto the existing rope or slightly offset it to create a more textured look.
6. **Maintain Even Tension:** As you build up the sides, try to keep the tension on the rope consistent. This will help create a uniform look and prevent any slack areas.
7. **Adding the Outer Edge:** When you reach your desired side height, apply a final bead of glue along the top edge of the last rope coil. Press the end of the rope firmly into this glue, securing it. You can trim any excess rope neatly.
8. **Optional: Painting or Staining:** If you skipped painting the base, or want to unify the colour, now is the time to paint or stain your entire basket tray. Apply thin, even coats and allow each coat to dry completely. Jute and natural fibers absorb paint beautifully.
9. **Optional: Sealing:** Once your paint or stain is completely dry, lightly spray the entire tray with a sealant. This will protect it from spills and wear. Let it dry thoroughly before use.
Adapting for Small Spaces and Rentals
The beauty of this DIY is its adaptability, especially for those living in rentals or smaller apartments where drilling is a no-go.
* **No Drill Option:** This entire tutorial relies on hot glue, making it perfect for renters. The base can be made from multiple layers of sturdy cardboard, eliminating the need for wood or nails. You can even find pre-made cardboard or thin wood bases at craft stores that are lightweight and can be glued.
* **Size Customization:** For very small spaces, simply scale down the dimensions. A 6-inch by 8-inch (15cm x 20cm) tray can be perfect for holding keys and mail on a narrow console table.
* **Lightweight Materials:** If portability is key, stick to cardboard for your base and use lighter-weight natural ropes like thin jute or seagrass.
Styling Your New Basket Tray: Where Texture Meets Tranquility
A basket tray is more than just storage; it’s a styling opportunity!
* **Colour Palette:** Natural tones like beige, cream, and brown are classic and versatile. However, don’t shy away from colour! Painting your tray in a soft sage green, a dusty rose, or even a bold navy can make a statement. Consider your existing decor:
* *Coastal Vibes:* Natural jute or seagrass with touches of white and blue.
* *Bohemian Chic:* Layering textures with macrame elements and earthy tones.
* *Modern Farmhouse:* Painted in a soft grey or white, paired with rustic decor.
* **Texture Play:** Mix and match the texture of your tray with the items you place inside. Smooth ceramic vases look lovely next to rough-hewn wooden bowls.
* **What to Put Where:**
* **Coffee Table:** Remote controls, a small stack of magazines, a decorative candle, and a small plant or a few decorative spheres.
* **Entryway Console:** Keys, a small wallet or coin dish, a handwritten note, and perhaps a small potted succulent.
* **Bathroom Counter:** Toiletries, skincare products, decorative soaps, and a small hand towel.
* **Dresser Top:** Perfumes, jewelry dishes, and a decorative trinket.
* **Strategic Placement:** Don’t overfill the tray. The empty space around the items is just as important for creating a visually appealing vignette. Aim for an asymmetrical balance.
Keeping It Tidy After Week One (and Beyond!)
The beauty of a well-organized basket tray is that it’s easy to maintain.
* **The “One-Minute Rule”:** If putting an item away takes less than a minute, do it immediately. This prevents clutter from accumulating.
* **Designated Homes:** Make sure every item in the tray has a clear purpose and a designated spot within the tray. Remotes always go here, keys always go there.
* **Weekly Tidy-Up:** Dedicate just five minutes each week to quickly reassess the contents of your tray. Remove anything that doesn’t belong, wipe down any dust, and readjust items as needed.
* **Deep Clean (As Needed):** If you’ve used a sealant, a damp cloth is usually sufficient for cleaning spills or dust. For more stubborn marks, you might need a mild soap and water solution, ensuring the tray dries completely afterwards.
Mistakes That Make This DIY Fail
Even with an easy project, a few common pitfalls can lead to a less-than-perfect result.
* **Impatient Gluing:** Rushing the hot glue application is the number one culprit. If the glue cools before you press the rope into it, the bond will be weak. Work in small, manageable sections.
* **Loose Rope Coiling:** Don’t let the rope get slack as you coil. Consistently apply gentle pressure to keep it tight against the previous layer. This ensures a sturdy and aesthetically pleasing finish.
* **Flimsy Base:** Using a single layer of thin cardboard or a flimsy material for the base will result in a tray that warps or collapses under weight. Double or triple up on cardboard or opt for thin plywood for better structural integrity.
* **Overfilling:** Trying to cram too much into your basket tray defeats the purpose of stylish organization. It will look cluttered and messy. Curate the items you place inside.
* **Ignoring the Edges:** When finishing the rope, make sure the end is securely glued down and any excess is trimmed neatly. A messy edge can make the entire tray look unfinished.
* **Skipping the Sealant (for high-use areas):** If your tray will be used daily for keys or remotes, or in a bathroom, skipping a sealant means it’s more susceptible to stains and wear.
Creating your own Pottery Barn-inspired basket tray is a rewarding and budget-friendly way to elevate your home organization and add a touch of handmade charm. So gather your supplies, embrace a little creativity, and get ready to style your space with chic, affordable beauty!
Conclusion
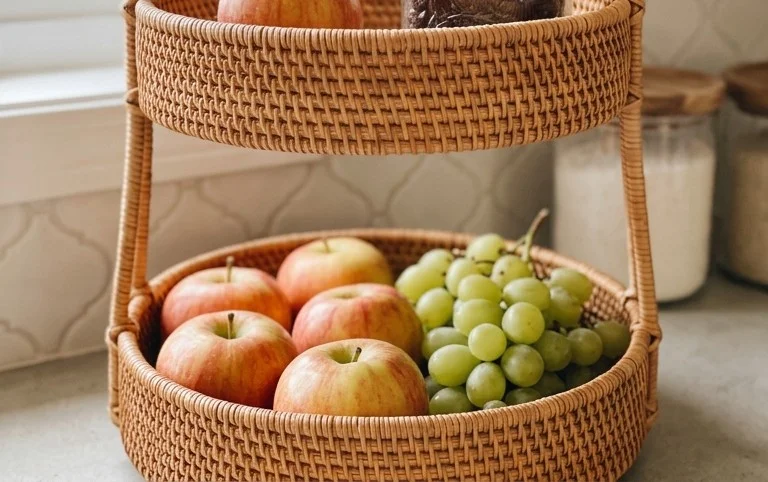
See how a few simple materials can transform your space? This Pottery Barn inspired basket tray isn’t just about aesthetics; it’s about bringing effortless organization and a touch of curated style into your daily life. Imagine a clutter-free coffee table, a tidy entryway, or a neatly arranged vanity. The difference it makes in streamlining your routine is truly significant. Ready to start today? Your smallest first step could be as simple as gathering some cardboard and twine. For a different room, try using fabric scraps for a softer touch in the bedroom, or painted wood for a more robust feel in the kitchen. Ready to explore more ideas and elevate your home decor? Keep discovering!