How to paint terracotta pots is the key to unlocking a whole new world of personalized plant displays. Do you ever look at those classic, earthy terracotta pots and wish they had a little more *oomph* to match your vibrant home decor? Maybe you’ve got a few chipped or faded ones gathering dust, feeling a bit too… ordinary for your stylish shelves. Imagine transforming them into stunning, eye-catching centerpieces, perfectly coordinated with your living room palette or adding a pop of cheerful color to your patio. The best part? It’s surprisingly affordable, often costing just a few dollars per pot, and a weekend afternoon is all you need to get started. In this guide, I’ll walk you through everything you need to know, from prepping your pots to achieving a flawless finish, so you can finally give your green friends the beautiful homes they deserve.
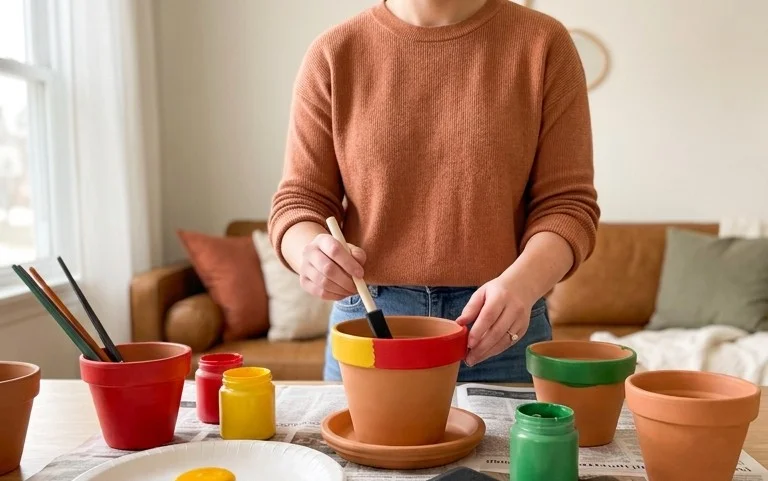
Transform Your Greenery: A Step-By-Step Guide to Painting Terracotta Pots
There’s something undeniably charming about terracotta pots. Their earthy tones and porous nature make them a beloved choice for plant enthusiasts. But sometimes, the classic look can feel a little… plain. Or perhaps you have a collection that’s seen better days, with faded paint or chipped edges. Whatever your reason, painting your terracotta pots is a fantastic, budget-friendly way to inject some personality into your indoor jungle or outdoor patio. It’s a project that requires minimal skill and can be incredibly rewarding. As someone who loves to give old things new life, I’ve found painting terracotta to be one of the most satisfying DIYs. Let’s dive in and discover how to transform these humble vessels into vibrant works of art!
What You’ll Need and A Rough Cost Breakdown
Gathering your supplies is the first step to a successful project. Thankfully, painting terracotta pots is surprisingly affordable. Here’s what I typically gather:
- Terracotta Pots: This is the star of the show! Prices vary wildly depending on size and brand. A small 4-inch pot might cost you $2-$5, while a larger 10-inch pot could be $15-$30. For this guide, let’s assume you’re starting with three medium-sized pots (around 6-8 inches in diameter). You can often find multipacks for a good deal, or individual pots at garden centers and home improvement stores. Let’s budget around $20-$40 for the pots themselves.
- Primer: A good quality primer is essential for paint adhesion and a smooth finish. I recommend a water-based spray primer specifically for outdoor or multi-surface use. A single can (around 10-12 oz) usually costs between $8-$15 and can cover a good number of pots.
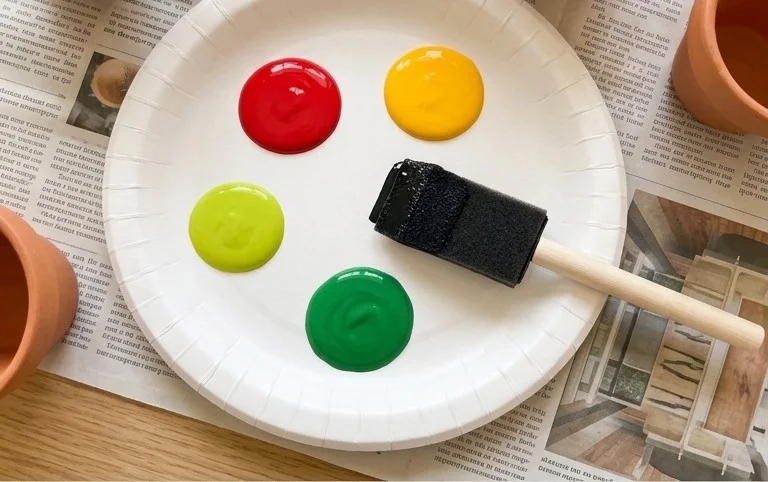
- Paint: This is where you can get creative! For outdoor use, acrylic paints are a fantastic choice. You can opt for spray paint for quick and even coverage or brush-on acrylics for more detailed work. For a few medium pots, one or two cans of spray paint (10-12 oz each) at $6-$12 per can should suffice. If you’re going for brush-on, a small bottle of acrylic craft paint (2-4 oz) is typically $3-$8. For this guide, let’s budget $15-$25 for paint, assuming a mix of colors or a couple of spray cans.
- Sealant: To protect your beautiful paint job from the elements (especially if they’re going outside), a clear sealant is a must. I prefer a water-based, clear acrylic sealant spray or brush-on. A can or bottle usually costs between $8-$15.
- Brushes (if using brush-on paint): If you opt for brush-on paints, you’ll need a few synthetic brushes in various sizes. A pack of assorted brushes can be found for $5-$10.
- Sandpaper: A fine-grit sandpaper (around 150-220 grit) is useful for smoothing any rough edges on the pot before painting. A small pack is typically $3-$5.
- Drop Cloth or Newspaper: To protect your workspace from paint drips. You can use old newspaper, cardboard, or a dedicated drop cloth. Free if you use what you have!
- Gloves: To keep your hands clean.
- Mask (if spray painting): Essential for protecting your lungs from spray paint fumes.
- Bucket and Water: For cleaning brushes if using brush-on paint.
Rough Total Estimated Cost: Adding it all up, you’re looking at a budget of roughly $60-$110 for everything, depending on the number and size of pots and the brands you choose. This is a fantastic return on investment for a significant decor upgrade!
Measuring and Planning Before You Start
Before you even think about picking up a brush, take a moment to plan. This is crucial for avoiding mistakes and ensuring a cohesive look, especially when dealing with multiple pots.
- Assess Your Space: Where will these pots live? Are they going on a sunny balcony, a shaded patio, or inside your living room? This will influence your color choices and the type of paint and sealant you use. For indoor use, you have more flexibility; for outdoor, you need weather-resistant options.
- Consider Your Existing Decor: Look around the area where the pots will be placed. What colors are already present? What is the overall style? You want your painted pots to complement, not clash. Are you going for a minimalist vibe, a bohemian feel, or a bold pop of color?
- Sketch It Out (Optional but Recommended): Grab a piece of paper and quickly sketch out where each pot will go. This helps you visualize the final arrangement and how different colors or designs might look together. For example, if you have a cluster of pots, you might want to use a gradient of colors or a repeating pattern for visual interest.
- Measure Your Pots: While not strictly necessary for the painting itself, knowing the diameter and height of your pots can help when planning patterns or estimating paint coverage. For instance, if you’re planning to paint a design that wraps around the pot, you’ll want to know the circumference.
- Color Palette: Choose your colors! I love to stick to a palette of 2-3 complementary colors for a sophisticated look. Or, go bold with a single vibrant hue. For inspiration, think about your favorite flowers, your home’s interior colors, or even nature itself.
Your Step-By-Step Painting Journey
Now for the fun part! Follow these steps for beautifully painted terracotta pots:
- Clean Your Pots: This is non-negotiable. Terracotta is porous, so any dirt, dust, or old paint will prevent the new paint from adhering properly. Scrub your pots thoroughly with warm, soapy water and a stiff brush. Rinse them well and let them dry completely. This can take 24-48 hours, especially if they’re still damp from previous use.
- Sand (Optional but Recommended): If your pots have any rough patches, chalky residue, or old flaky paint, a light sanding with fine-grit sandpaper will create a smoother surface for priming. Wipe away any dust with a damp cloth after sanding.
- Prime Your Pots: This is a crucial step for ensuring your paint sticks.
- If using spray primer: Take your pots outside or to a well-ventilated area (wearing your mask!). Place them on your drop cloth. Shake the primer can vigorously for about 30 seconds. Hold the can about 8-10 inches away from the pot and apply thin, even coats. Rotate the pot as you spray to ensure full coverage. Let the first coat dry for at least 15-20 minutes before applying a second coat. Two thin coats are better than one thick one.
- If using brush-on primer: Apply a thin, even coat of primer using your brush. Work in one direction for a smooth finish. Allow it to dry completely according to the product instructions (usually 1-2 hours). You might need two coats for full coverage.
- Paint Your Pots: Once the primer is completely dry, it’s time to add your color!
- Spray paint: Similar to priming, work in a well-ventilated area with your mask on and drop cloth down. Shake the paint can well. Apply thin, even coats, rotating the pot as you go. Allow each coat to dry for the recommended time (check the can, usually 15-30 minutes) before applying the next. You might need 2-3 coats for opaque coverage, depending on the color and the primer color underneath.
- Brush-on paint: Apply your chosen acrylic paint with your brushes. For solid colors, aim for even strokes. If you’re creating a pattern, take your time and be precise. Allow each coat to dry completely before applying the next. Again, 2-3 coats are often needed for full opacity.
- Add Details or Patterns (Optional): If you’re feeling artistic, this is the time to add stripes, dots, stencils, or any other design you’ve planned. Ensure each layer of paint is fully dry before adding the next to avoid smudging.
- Seal Your Pots: Once all your paint is completely dry (this can take up to 24 hours for acrylics), it’s time to seal.
- Spray sealant: In your well-ventilated area, apply 2-3 thin, even coats of clear sealant, allowing each coat to dry according to the product instructions. This will protect your paint from moisture and UV rays.
- Brush-on sealant: Apply thin, even coats of your brush-on sealant, allowing each layer to dry.
Let your sealed pots cure for at least 48 hours (ideally 72 hours) before adding soil and plants. This ensures the sealant is fully hardened and won’t be compromised by moisture.
Styling Your Painted Pots
The fun doesn’t stop at the paint! How you style your pots makes all the difference.
- Color Choices:
- Earthy Tones: Muted greens, soft blues, deep ochres, and creams create a sophisticated, natural feel. These work well in almost any setting.
- Bold & Vibrant: Think fuchsia, teal, bright yellow, or a bold geometric pattern. These make a statement and add personality, perfect for a modern or eclectic space.
- Monochromatic Magic: Painting a few pots in varying shades of the same color (e.g., light to dark gray) creates a cohesive and elegant look.
- Texture Play: While the pots themselves are terracotta, you can add texture through the paint. Consider a matte finish for a subtle, modern look, or a high-gloss finish for a more dramatic effect. You can also experiment with adding a texture medium to your paint for a raised effect.
- Placement is Key:
- Groupings: Cluster pots of different sizes and heights together for visual interest. Vary the colors within the group for a dynamic display.
- Focal Points: A single, brightly painted pot can act as a striking focal point on a patio or by an entryway.
- Indoors: Place painted pots on bookshelves, windowsills, or side tables. Consider matching the pot color to existing decor elements in the room.
- Outdoors: Arrange them along pathways, on steps, or grouped around outdoor seating.
- What to Put Where:
- Tall, slender pots: Perfect for plants with upright growth habits, like snake plants or bird of paradise.
- Wider, shallower pots: Ideal for succulents, herbs, or trailing plants like pothos.
- Consider the plant’s needs: Ensure the pot size and drainage are appropriate for your chosen plant. Terracotta’s breathability is great for plants that prefer to dry out between waterings.
Keeping It Tidy After Week One
Once your beautiful pots are planted and in their designated spots, a little ongoing care will keep them looking their best.
- Water Wisely: Terracotta is porous, meaning it breathes. This is great for plants, but it can also lead to salt buildup on the outside of the pot over time, especially if you use fertilizers. Try to water the soil directly and avoid overwatering. If you see white powdery marks (salt deposits), a gentle scrub with a damp cloth should remove them.
- Gentle Cleaning: For general dusting, a soft brush or a dry microfiber cloth is usually sufficient. If you notice any dirt or grime, use a damp cloth, but avoid harsh chemicals.
- Sun Exposure: If your pots are outdoors, bright, direct sunlight can fade certain paint colors over time. If you used a good quality exterior paint and sealant, this should be minimal, but it’s something to be aware of.
Mistakes That Make This Project Fail
Even the simplest DIYs can go awry if we’re not careful. Here are the common pitfalls to avoid:
- Skipping the Prep Work: The most common mistake is not cleaning the pots properly. Any dirt, dust, or old residue will prevent the paint from adhering, leading to chipping and peeling very quickly.
- Not Priming: Terracotta is very absorbent. Without primer, your paint will soak in unevenly, requiring many more coats and likely still not looking great. Primer creates a barrier for a smooth, even finish.
- Using Interior Paint Outdoors: Exterior paint is formulated to withstand UV rays, moisture, and temperature fluctuations. Interior paint will crack, peel, and fade rapidly when exposed to the elements.
- Applying Paint Too Thickly: Thick coats of paint are more prone to cracking and can obscure the texture of the terracotta. Thin, even coats are always the way to go.
- Not Sealing (Especially Outdoors): If your pots are going outside, skipping the sealant is a recipe for disaster. Moisture will seep into the painted surface, causing the paint to degrade and peel.
- Not Letting Paint Dry Completely: Trying to rush the process by painting over wet paint will result in smudges, streaks, and a messy finish. Patience is key!
- Not Allowing Sealant to Cure: Just like paint, sealant needs time to fully harden. Planting too soon can damage the sealant and expose the paint to moisture.
Painting terracotta pots is a delightful and accessible way to elevate your plant display. With a little planning and careful execution, you’ll have stunning, custom-designed pots that truly reflect your style. Happy painting!
Conclusion
Transforming your terracotta pots with a fresh coat of paint truly elevates your living space, bringing a touch of personalized charm that brightens your day-to-day environment. It’s amazing how much a little color can impact the mood of a room or a corner of your garden. Ready to get started? Your smallest first step could be as simple as selecting one pot and a single color you love.
For a touch of boho chic in your living room, consider a muted, earthy tone. On a tighter budget, or for a quick refresh, a simple matte black or white can create a sophisticated statement.
Don’t stop here! We have so many more inspiring home decor and organization ideas waiting for you.