Extra large pegboard can be your craft room’s new best friend. Are you tired of rummaging through drawers and piles for that one specific tool, paint color, or fabric swatch? Does your creative space feel more like a chaotic jumble than a serene sanctuary? Imagine a world where everything has its designated spot, clearly visible and within easy reach. With a spacious pegboard, that dream is within reach! For a surprisingly affordable investment, typically under $50, and a weekend afternoon of your time, you can transform your craft zone into an organized masterpiece. In this article, I’ll walk you through exactly how to achieve this, from choosing the right pegboard to strategically placing your tools and supplies.
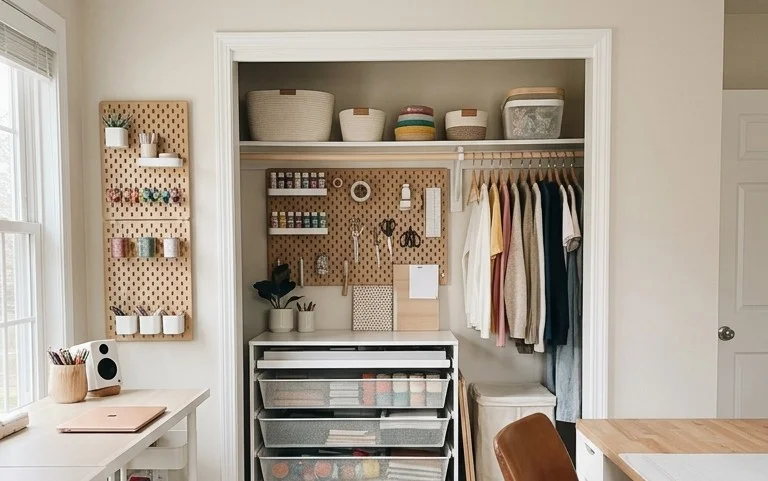
Unleash Your Crafting Potential: Conquering Clutter with an Extra-Large Pegboard
Every crafter dreams of a sanctuary, a space where creativity flows unimpeded by misplaced scissors or overflowing bins. For years, my craft room felt more like a battlefield of supplies than a haven. Then, I discovered the magic of an extra-large pegboard, and let me tell you, it was a game-changer. If you’re wrestling with a similar crafting chaos, an oversized pegboard might just be your ultimate organization ally.
What You Need and Roughly What It Costs
The beauty of a pegboard is its versatility, but choosing the right size and materials is key. For an “extra-large” setup, I’m talking about a board that can truly make a statement and accommodate a significant amount of your crafting arsenal.
For a substantial pegboard, consider a single sheet of 4′ x 8′ pegboard. These are readily available at most hardware stores. You’ll want to opt for a quality material, like hardboard or tempered hardboard, which is more durable than standard pegboard. For this size, expect to pay anywhere from $30 to $60 depending on the thickness and material.
Beyond the board itself, you’ll need:
* Pegboard hooks, bins, and shelves: This is where the real customization happens. I recommend a variety pack to start, which usually costs between $20 and $40 and gives you a good mix of different hook types (j-hooks, l-hooks, loop hooks), small bins, and perhaps a couple of shelf kits. As you get more specific with your needs, you can always purchase individual hooks for $0.50 to $2 each.
* Mounting hardware: This will depend on your wall type. For drywall, you’ll need sturdy screws (around 2-3 inches long) and wall anchors. A pack of 12-20 heavy-duty screws and anchors can cost between $10 and $20. If you’re mounting to studs, you’ll just need screws, which are typically cheaper.
* (Optional) Wood strips or furring strips: If you want to create a bit of space between the pegboard and the wall for easier hook insertion and a more professional look, you’ll want some 1″ x 2″ x 8′ furring strips. You’ll likely need 2-3 of these, costing around $5 to $10.
* A drill and drill bits: Essential for creating pilot holes and securing the pegboard.
* A level: To ensure your pegboard is straight.
* A measuring tape: To plan your layout.
* A pencil: For marking.
* A saw (if you plan to cut the pegboard down): A hand saw is sufficient, but a circular saw will make it quicker.
* Safety glasses and gloves: Always important when working with tools.
So, for a truly comprehensive extra-large pegboard setup, you’re looking at a rough investment of $60 to $130. This might seem like a chunk of change, but when you consider the years of organized bliss it will bring, it’s a small price to pay.
Measuring and Planning Before You Start
Before you even think about drilling, take a deep breath and plan. A few minutes of thoughtful preparation can save you a lot of frustration down the line.
First, assess your wall space. Where do you want your pegboard to live? Consider the flow of your craft room. Do you want it near your workspace for easy access to tools? Or perhaps along a longer wall to maximize its impact? Measure the available wall space carefully. An 8-foot pegboard will need a good stretch of clear wall.
Next, think about what you *actually* need to store. Lay out your most frequently used crafting supplies. Group similar items together. Are you a painter with dozens of brushes? A sewer with spools of thread? A scrapbooker with stacks of paper and embellishments? This inventory will dictate the types and quantities of hooks, bins, and shelves you’ll need. Don’t just eyeball it; a quick count can be eye-opening. For example, I realized I had over 50 pairs of scissors and snips that needed a home!
Sketch out your pegboard design on paper. This is where you can visualize where different items will go. Consider the weight of the items. Heavier items should be placed lower down and secured with sturdier hooks. Lighter items can go higher up. Think about accessibility – tools you use daily should be at eye level.
The Step-by-Step Process to a Clutter-Free Craft Room
Alright, planning complete! Now, let’s get this pegboard mounted.
1. **Prepare the Wall:** Clear the wall space where your pegboard will be mounted. Use your level and pencil to mark the desired top corners of your pegboard. If you’re using furring strips, mark where these will attach to the wall, ensuring they are level.
2. **Mount Furring Strips (Optional):** If you’re using furring strips, pre-drill holes through the strips and into the wall at stud locations. If you’re not hitting studs, use your wall anchors. Secure the furring strips to the wall with screws, ensuring they are perfectly level.
3. **Mark Pegboard Mounting Points:** Hold your pegboard up to the wall (or furring strips). Use your level to ensure it’s straight, and mark the locations of the holes on the pegboard that will align with your wall studs or furring strips. You’ll want to mark at least four points, ideally more for an 8-foot board, distributed around the perimeter.
4. **Drill Pilot Holes:** Remove the pegboard. At the marked points, drill pilot holes into the wall (or furring strips). The size of your pilot hole should be slightly smaller than the diameter of your screws. If using wall anchors, follow the anchor manufacturer’s instructions for pilot hole size.
5. **Mount the Pegboard:** Position the pegboard back against the wall, aligning the holes. Insert your screws through the pegboard holes and into the pilot holes (or anchors/furring strips). Start by loosely screwing in a few screws to hold the board in place, then use your level again to make any minor adjustments before tightening all the screws securely. Make sure the pegboard is flush and stable.
6. **Add Your Hardware:** Now for the fun part! Start inserting your hooks, bins, and shelves into the pegboard holes. Experiment with different placements until you find what works best for your supplies.
Adapting for Small Spaces or Rentals
Don’t have a dedicated craft room or a wall you can drill into? No problem! An extra-large pegboard can still be your savior.
* **Freestanding Unit:** Instead of mounting to the wall, you can create a freestanding unit. Purchase two shorter pieces of wood (about 6 feet long) and attach them to the bottom of the pegboard, extending outwards like legs to create a stable base. You can then reinforce this with cross braces. This will take up floor space, so consider a narrower, but still tall, pegboard.
* **Over-the-Door:** If you have a sturdy door, an over-the-door pegboard organizer is a fantastic option for rentals. You can often find large ones that hang securely without any drilling.
* **Command Strips (for lighter loads):** For very lightweight items and smaller pegboard sections, you might be able to get away with heavy-duty removable adhesive strips like Command. However, for an extra-large pegboard and the weight of most crafting supplies, this is generally not recommended as a primary mounting solution.
Styling Notes: Where to Put What for an Aesthetic Appeal
A pegboard doesn’t have to be an eyesore! With a little thought, it can become a beautiful and functional piece of decor.
* **Color and Texture:** Consider painting your pegboard before mounting it. A soft pastel, a bold accent color, or even a natural wood stain can elevate its look. For added texture, you can attach fabric panels or corkboard sections to parts of the pegboard.
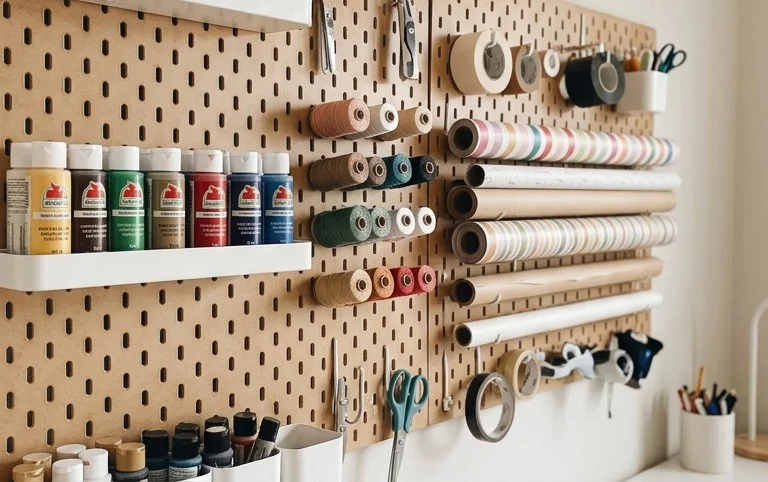
* **Strategic Placement:** Group similar items together. Keep all your cutting tools on one section, your drawing supplies on another, and your adhesives within easy reach.
* **Aesthetic Hooks:** Invest in some aesthetically pleasing hooks. Metal, wood, or even colorful plastic hooks can add personality.
* **Empty Space is Your Friend:** Don’t feel the need to fill every single hole. Strategically placed empty spaces can make the pegboard look less cluttered and more intentional.
* **Baskets and Bins:** Use baskets and bins for smaller items like beads, buttons, or threads. These add visual interest and keep tiny things contained. Consider clear bins so you can easily see what’s inside.
* **Visual Interest:** Hang a few inspiring pieces of art or photos amongst your supplies to add a personal touch.
Keeping it Tidy After Week One
The initial excitement of a perfectly organized pegboard can wane. Here’s how to maintain that order:
* **The “One In, One Out” Rule:** When you buy a new crafting supply, make sure to find a place for it immediately, and ideally, get rid of something similar you no longer use.
* **Daily Tidy Up:** Before you finish crafting for the day, take five minutes to put everything back in its designated spot. This is the most crucial habit to develop.
* **Weekly Review:** Once a week, do a quick sweep. Are any bins overflowing? Are hooks empty? Is anything misplaced? A quick reorganization can prevent chaos from returning.
* **Seasonal Purge:** Twice a year, do a more thorough declutter. Go through each section and ask yourself if you truly use and need those items.
Mistakes That Make This Fail
Even the best-laid plans can go awry. Here are a few common pitfalls to avoid:
* **Underestimating the Amount of Supplies:** This is the biggest one. Many people buy a standard pegboard and quickly realize it’s not enough. An extra-large board is key if you have a significant collection of supplies.
* **Not Securing It Properly:** A wobbly pegboard is not only an eyesore but also a safety hazard. Ensure you’re using appropriate mounting hardware and securing it firmly to the wall or your freestanding base.
* **Overcrowding:** Trying to cram too much onto the pegboard will defeat the purpose of organization. Leave some breathing room.
* **Not Having a System:** Without a designated spot for everything, you’ll end up with a jumbled mess. Be consistent with where you put things.
* **Ignoring Weight Limits:** While pegboards are sturdy, don’t overload them with excessively heavy items. Distribute weight as much as possible.
An extra-large pegboard is more than just a storage solution; it’s an investment in your creative well-being. It transforms a chaotic craft space into an organized, inspiring haven where your ideas can flourish. So, go ahead, embrace the pegboard revolution, and unleash your crafting potential!
Conclusion
Transforming your craft room with an extra large pegboard is more than just an organizational hack; it’s a daily dose of calm and efficiency. Imagine finding exactly what you need, exactly when you need it, without a rummage through drawers. The sheer visual clarity and accessibility an organized pegboard provides can truly shift your creative flow for the better.
Ready to start? Your smallest first step today could be as simple as clearing one small section of wall to map out where your extra large pegboard might live. Don’t have a dedicated craft room? Consider a smaller pegboard for your kitchen spices or a clever wall organizer for your entryway keys and mail.
We hope this inspires you to embrace the power of organization. Keep exploring for more ideas to make your home both beautiful and functional!