Eckschreibtisch selber bauen – ganz einfach! Wir alle kennen das: Diese eine Ecke im Raum, die irgendwie ungenutzt bleibt, oder der Wunsch nach mehr Arbeitsfläche, ohne gleich ein Vermögen auszugeben. Vielleicht stehen auch Sie vor diesem Problem und fragen sich, wie Sie Ihren Raum optimal nutzen können? Mit diesem Projekt verwandeln wir diese vergessene Ecke in Ihren neuen Lieblingsplatz: einen stilvollen und funktionalen Eckschreibtisch, der perfekt zu Ihnen und Ihrem Zuhause passt.
Stellen Sie sich vor: Eine großzügige, aufgeräumte Arbeitsfläche, auf der alles seinen Platz findet, und das alles in Ihrem ganz persönlichen Stil. Und das Beste daran? Sie können das Projekt mit ein wenig handwerklichem Geschick und für unter 150 Euro in einem Wochenende realisieren. In diesem Artikel zeige ich Ihnen Schritt für Schritt, wie Sie Ihren eigenen, maßgeschneiderten Eckschreibtisch bauen – ganz ohne komplizierte Techniken. Wir kümmern uns um die Materialauswahl, die einfachen Schnittmuster und die Montage. Machen Sie sich bereit, Ihr Zuhause zu verschönern und clever zu organisieren!
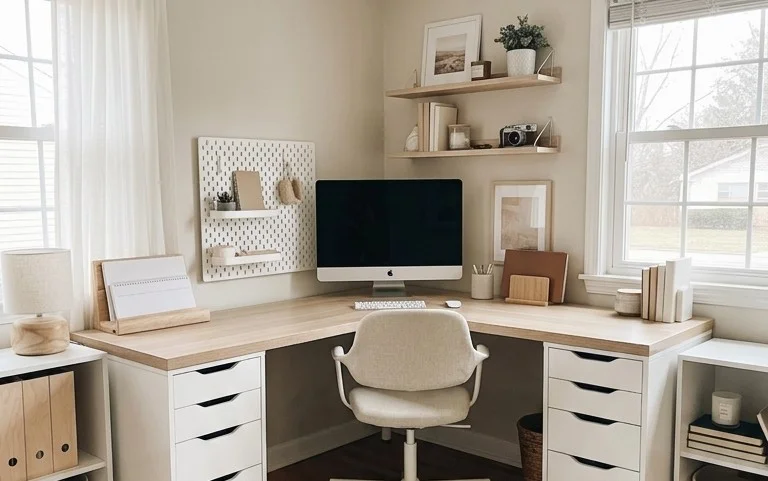
Eckschreibtisch Selber Bauen – Ganz Einfach!
Ever looked at that awkward corner in your home and thought, “This space is just begging for a desk”? Or perhaps you’ve dreamed of a dedicated workspace that perfectly fits your needs, but the prices for custom-made corner desks are just astronomical. Well, I’ve got fantastic news for you! Building your own corner desk isn’t just possible; it’s surprisingly straightforward, even if you’re a DIY novice. Today, I’m going to walk you through how to create your very own functional and stylish corner desk, like the ones you see on kwaara, without breaking the bank or needing an engineering degree.
The beauty of DIY is customization. You get to decide the exact dimensions, the materials, the finish – everything! This guide will equip you with the knowledge to tackle this project with confidence. We’ll cover what you need, how to plan, a step-by-step process, and even how to adapt it for tricky situations like small apartments or rentals. Plus, we’ll sprinkle in some styling tips to make your new desk not just functional, but a beautiful addition to your home.
What You’ll Need: Your Shopping List and Budget
Let’s get down to brass tacks. The beauty of a simple DIY corner desk is that it doesn’t require a huge investment. The core components are usually wood panels and some basic hardware.
Here’s a general idea of what you’ll need. Prices are approximate and can vary greatly depending on your location, the specific materials you choose, and current market prices.
- Wooden Panels: For a desk this size, you’ll likely need two larger pieces for the desktop. I recommend using pre-cut MDF or a decent quality plywood. For a desk that’s roughly 120 cm on each side (a common size for a corner), you might need two panels measuring 120 cm x 60 cm. MDF is affordable and easy to work with, usually costing around €20-€40 per panel depending on thickness (18-25mm is good). Plywood offers more durability and a nicer finish if you plan to stain or varnish, potentially costing €30-€60 per panel.
- Support Structure: This is where the “desk” part of your desk comes in. You have a few options here:
- Desk Legs: Simple, sturdy table legs. You can find these online or at hardware stores. A set of four metal legs might cost €30-€60.
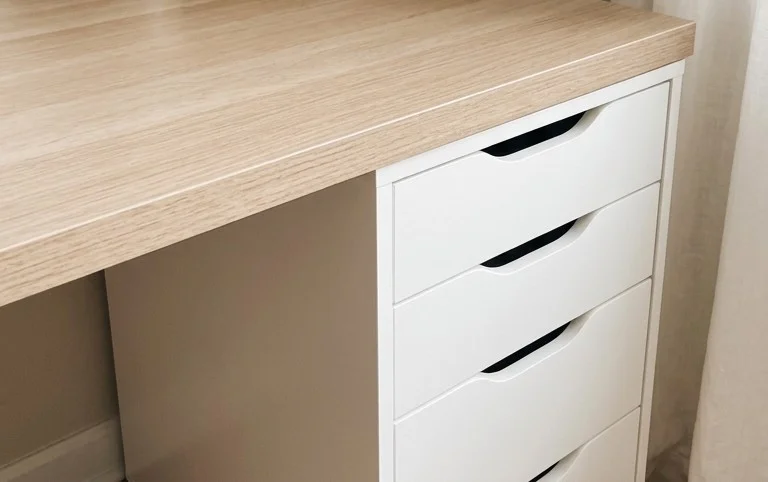
- Cabinet/Drawer Units: Using ready-made cabinets (like those from IKEA) as support is a fantastic way to add storage. Two small cabinets, around 40 cm wide and 60 cm deep, could cost €50-€100 each.
- Wooden Supports/Frames: Building your own frame from 4×4 cm or 5×5 cm timber can be cost-effective. A few meters of timber will cost around €15-€30.
- Screws and Fixings: Wood screws are essential. Ensure they are the right length for your wood thickness. A box of assorted wood screws will cost about €5-€10. If you’re using brackets, budget another €10-€20.
- Optional: Edging Banding/Veneer: To give your raw wood edges a clean, finished look. A roll of adhesive edging band is usually under €10.
- Optional: Paint, Stain, or Varnish: Depending on your desired finish. A can of paint or varnish can range from €15-€30.
- Tools: You’ll likely need a measuring tape, a pencil, a saw (if you’re not getting panels cut to size), a drill with appropriate drill bits (for pilot holes and screws), a screwdriver (or use the drill), and possibly sandpaper. If you don’t have these, a basic toolkit might cost €50-€100.
So, for a basic desk with legs and pre-cut panels, you could be looking at a total cost of roughly €100-€200. If you opt for cabinets for storage, the price will increase accordingly. This is significantly less than many pre-fabricated corner desks on the market!
Measuring and Planning: The Foundation of Success
Before you even *think* about buying materials, take some time to measure your space. This is the most critical step to ensure your desk fits perfectly and functions beautifully.
- Identify Your Corner: Which corner are you using? Measure the length of each wall that forms the corner. For example, you might have 130 cm on one wall and 150 cm on the other.
- Desk Dimensions: How deep do you want your desk to be? A standard desk depth is around 60-70 cm. Deeper desks offer more workspace but can feel overwhelming in smaller rooms. Consider the width of your monitor, keyboard, and any other essentials you’ll have on your desk.
- Legroom: How much space do you need to sit comfortably? Measure from the floor to the underside of your desktop. Ensure there’s ample room for your legs to move freely. If using cabinets, the height of these will dictate your desktop height.
- Obstructions: Are there any windows, radiators, outlets, or light switches that will interfere with your desk placement or design? Mark these on your measurements.
- Sketch it Out: Grab a piece of paper and sketch your corner. Draw in your desired desk shape, marking your wall measurements. Then, draw in your desktop panels. A common approach is to have two rectangular panels that meet at a right angle. You can make them the same size or have one slightly larger. For example, if your corner walls are 130 cm and 150 cm, you might opt for two panels that are 120 cm x 60 cm, which will leave a small gap at the wall for a cleaner look and to avoid touching radiators.
- Support Placement: Based on your sketch, decide where your legs or cabinets will go. For stability, you’ll want supports at the corners and potentially in the middle, especially for longer spans. Ensure they are positioned to allow for comfortable seating.
Don’t rush this phase. Accurate measurements and a clear plan will save you frustration and potential rework later on.
Your Step-by-Step Guide: Building Your Corner Desk
Now for the fun part – bringing your vision to life! Here’s a clear, numbered walkthrough:
- Prepare Your Panels: If you haven’t already, have your wooden panels cut to your planned dimensions. If you’re cutting them yourself, measure twice, cut once! Sand down any rough edges.
- Apply Edging (Optional but Recommended): If you’re using edging banding, follow the manufacturer’s instructions. Typically, you iron it onto the raw edges with a regular iron. Trim any excess carefully. This gives a very professional finish.
- Mark Support Locations: Flip your desktop panels upside down. Using your plan and measuring tape, mark the exact positions where your legs or cabinet tops will be attached. Ensure they are evenly spaced and at least 5-10 cm from the edges for stability.
- Attach Supports (Legs): If using table legs, drill pilot holes into the desktop at your marked locations. Then, screw the legs securely into place.
- Attach Supports (Cabinets): If using cabinets, simply place them in their intended positions. You’ll attach the desktop to the cabinets in the next step. Ensure the cabinets are level.
- Join the Desktop Panels (If Applicable): If you have two separate panels that meet at a corner, you’ll need to join them. You can do this underneath using L-brackets or by screwing them together from the underside if they are flush. For a seamless look, I recommend aligning them carefully and then using a couple of pieces of scrap wood across the join on the underside, screwing into both panels.
- Secure the Desktop to Cabinets (If Applicable): If you are using cabinets as your primary support, position the desktop panels on top. You can secure them from underneath by screwing up into the desktop, or from the top down into the cabinet. Be sure to use screws that are the correct length so they don’t poke through the top surface!
- Final Touches: Stand your desk up! Check for wobbles. If it’s a bit wobbly, you might need to add extra bracing or adjust your leg placement. Once stable, you can paint, stain, or varnish your desktop and supports as desired. Follow product instructions for drying times.
It’s incredibly satisfying to see your desk take shape! Take your time with each step, and don’t be afraid to ask for help if you need it.
Adapting for Small Spaces and Rentals
Don’t have a dedicated room? No problem! A corner desk is perfect for maximizing small spaces.
- Measurements are Key: For a small room, be even more precise with your measurements. A desk that is 100 cm x 100 cm might be more appropriate than a larger 120 cm x 120 cm.
- Floating Desk: If you can’t drill into walls for brackets and don’t want to use legs or bulky cabinets, consider a “floating” desk. This involves a strong, thick desktop panel that is supported by just two sturdy units at the ends (e.g., small filing cabinets or even stacked books if they are very stable and you’re on a super tight budget). Ensure the span is not too great, or it will sag.
- Rental-Friendly Supports: For rentals where drilling is forbidden, using sturdy, freestanding cabinets (like IKEA Kallax or smaller drawer units) is your best bet. They provide excellent support without any wall damage. Ensure they are heavy enough not to tip. You can also use adjustable height desk legs that screw into pre-drilled holes in the desktop, so no wall mounting is needed.
- Fold-Down or Compact Designs: While more complex, consider a design with a fold-down section or a smaller, more compact footprint if space is extremely limited. This guide focuses on a fixed corner desk, but it’s a starting point for inspiration.
Styling Notes: Making Your Desk a Statement
Once your desk is built and assembled, it’s time to make it look fantastic!
- Colour Palette: Consider the existing colours in your room. For a minimalist look, white, black, or natural wood tones work universally. If you want a pop of colour, a bold desk leg or a painted edge banding can add personality.
- Texture Play: Combine different textures. A smooth wooden desktop can be complemented by a woven desk mat, a ceramic mug, and a plush desk chair. Metal legs add an industrial feel, while wooden legs offer warmth.
- Zone Your Space: Think about what goes where.
- Primary Workspace: This is where your monitor, keyboard, and mouse will sit. Keep this area relatively clear for optimal focus.
- Secondary Workspace: This area can be for writing, sketching, or holding notes and reference materials.
- Storage Zone: If you have cabinets or drawers, use them for essentials like stationery, chargers, and documents. Open shelves can display decorative items and books.
- Personal Touches: Add plants, a desk lamp, photos, or artwork to make the space your own. But be mindful of clutter!
The key is to create a space that is both inspiring and functional.
Keeping it Tidy After Week One
The initial thrill of a new workspace can fade, and clutter can creep in. Here’s how to maintain order:
- The “One-Minute Rule”: If a task takes less than a minute (like putting a pen back in its holder or filing a single piece of paper), do it immediately.
- Daily Tidy-Up: Spend 5 minutes at the end of each workday clearing your desk. Put things back where they belong. Wipe down surfaces.
- Weekly Deep Dive: Once a week, dedicate 15-30 minutes to a more thorough declutter. Sort through papers, organize drawers, and discard anything you no longer need.
- Designated Homes: Ensure everything has a specific place. A charging station for electronics, a tray for incoming mail, a pen pot – these simple solutions make tidying effortless.
- “Outbox” System: If you get a lot of mail or paperwork, have an “inbox” and an “outbox” tray. Process your inbox regularly and move completed items to the outbox.
A tidy desk is a clear mind!
Common Mistakes That Make This Fail
Even with the best intentions, a DIY project can go awry. Here are some pitfalls to avoid:
- Poor Planning/Measuring: I can’t stress this enough. Measure your space, measure your materials, and double-check everything before cutting or assembling. A desk that doesn’t fit or is the wrong height is a failed project.
- Underestimating Material Strength: Using flimsy wood or inadequate supports will lead to a wobbly, unstable desk that could sag over time. Invest in decent quality materials for your desktop and supports.
- Ignoring Pilot Holes: Forcing screws into wood without drilling pilot holes can cause the wood to split, especially near edges. Always drill pilot holes that are slightly smaller than your screw diameter.
- Overcrowding the Space: Trying to cram too much into a small corner can make the desk feel oppressive and less functional. Stick to your planned dimensions and be realistic about what you can fit.
- Skipping the Finishing Touches: Leaving raw, unfinished wood edges looks amateurish and can snag on clothing. Edging banding or proper sanding and finishing makes a huge difference.
- Not Allowing for Legroom: Building a desk that is too low or has supports that get in the way will make it uncomfortable to use. Always consider ergonomics.
Building your own corner desk is a rewarding project that delivers a highly personalized and functional workspace. With careful planning, the right materials, and a little bit of elbow grease, you can create a desk that is both beautiful and incredibly practical. Happy building!
Conclusion
A well-organized workspace, like the Eckschreibtisch selber bauen you’ve just learned about, can truly transform your daily productivity and sense of calm. Imagine reclaiming that corner, enjoying a clutter-free surface, and finding everything you need with ease. Don’t let the project seem daunting! Your smallest first step today could be as simple as measuring your available space or gathering a few basic tools. For a different feel, consider a compact standing desk in the bedroom for quick tasks, or a budget-friendly wall-mounted shelf in the kitchen for recipe books. The possibilities are endless!
Ready for More?
Explore kwaara for countless other inspiring home decor and organization ideas to make your living space your own.