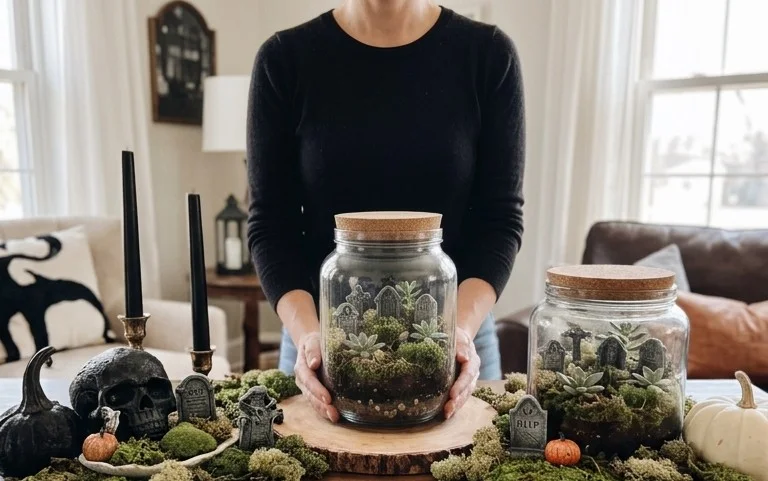
Cemeterriums are the delightful new way to bring a touch of spooky charm to your home this Halloween! Are you tired of your usual decor feeling a bit too… tame? Does your coffee table often become a dumping ground for mail and everyday clutter, making you wish for a more enchanting display? Imagine a small, elegant terrarium, but instead of lush greenery, it’s a miniature graveyard scene, complete with tiny tombstones, wisps of faux fog, and perhaps a skeletal inhabitant or two. It’s the perfect, contained dose of Halloween spookiness that adds personality without overwhelming your space. The best part? You can create one in just an hour or two, often for under $30! In this article, I’ll walk you through exactly how to craft your own hauntingly beautiful cemeterrium, from choosing the perfect container to sourcing your miniature macabre delights.
The Rise of the Cemeterrium: Your Spooky Sanctuary for the Season
Halloween is more than just costumes and candy. For many of us, it’s a chance to embrace the macabre, to flirt with the eerie, and to transform our homes into havens of atmospheric charm. This year, a new trend is creeping into our decor arsenals: the cemeterrium. Forget sprawling outdoor setups; these are charmingly spooky, compact displays that bring a little piece of Halloween’s gothic allure right into your living space. Think of it as a miniature, meticulously curated graveyard, a tiny testament to the delightfully dark. And trust me, it’s easier and more rewarding than you might think.
What Exactly Is a Cemeterrium?
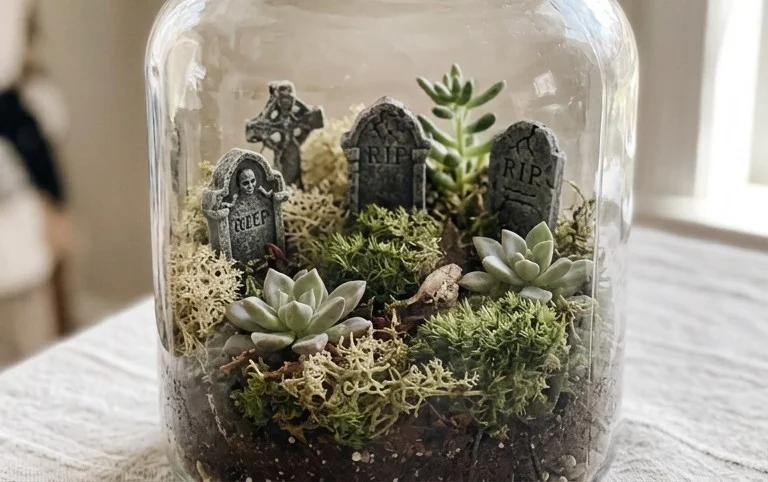
At its heart, a cemeterrium is a decorative display that mimics a small cemetery. It usually involves miniature gravestones, perhaps a tiny mausoleum or chapel, and a landscape of faux earth, moss, and skeletal figures. It’s an opportunity to get creative with scale, texture, and mood, all contained within a manageable space. Whether it’s a statement piece on your mantle or a charming vignette on your coffee table, a cemeterrium adds that essential touch of Halloween whimsy.
Gathering Your Graveyard Gear: What You Need and Roughly What It Costs
Embarking on your cemeterrium journey is exciting, and thankfully, it doesn’t require a huge investment. Here’s a breakdown of what you’ll likely need and the ballpark figures to keep in mind.
* **The Base:** This is the foundation of your miniature world.
* **Options:** A sturdy wooden tray (think 12×18 inches, around $15-$30), a deep shadow box frame (10×14 inches, $25-$50), or even a large, shallow planter box (10×20 inches, $20-$40).
* **Consideration:** The depth of your base is important. Aim for at least 3-4 inches to allow for landscaping and the height of your gravestones.
* **The “Earth”:** This creates your eerie landscape.
* **Options:** Crafting soil or dark brown potting soil (a 2-quart bag is usually enough, $5-$10), or faux moss sheets/rolls ($10-$20 for a decent coverage). You can also mix in some dark grey or black craft sand for added texture ($5-$10).
* **Tip:** If using real soil, ensure it’s dry and sieved for a smoother finish.
* **The Gravestones:** The stars of the show!
* **Options:** Miniature gravestone kits (often found at craft stores or online, can contain 5-10 stones for $15-$30), or you can DIY with craft foam sheets (about $8-$12 for a pack), thin balsa wood ($5-$10), or even air-dry clay (around $10-$15 for a good amount).
* **Quantity:** Aim for 5-10 gravestones, varying in size and shape for visual interest.
* **The Accents:** These bring your graveyard to life.
* **Options:** Small skeletal figures or animals ($5-$15 for a pack), mini cobwebs (a small bag is plenty, $3-$7), fairy lights (battery-operated, cool white or purple, $8-$15), tiny trees or branches ($5-$10), and perhaps a miniature mausoleum or spooky silhouette ($15-$40, depending on complexity).
* **Optional:** A small bag of black gravel or small dark pebbles for pathways ($5-$8).
* **Tools & Adhesives:**
* **Options:** Hot glue gun and glue sticks ($15-$25 for a starter kit), craft knife or scissors ($5-$10), paint brushes ($5-$10), and black or grey craft paint ($5-$10).
**Rough Total Investment:** Depending on your choices, you can create a fantastic cemeterrium for anywhere from $70 to $200. It’s a project where you can scale your spending based on the desired grandeur.
Measuring and Planning: The Blueprint for Your Booo-tiful Display
Before you even think about touching a glue gun, take a moment to measure and plan. This is crucial for ensuring your cemeterrium fits perfectly into its designated spot and looks balanced.
1. **Choose Your Location:** Where will your cemeterrium live? A mantlepiece? A console table? A bookshelf?
2. **Measure the Space:** Accurately measure the width, depth, and available height of your chosen spot. For example, if your mantle is 60 inches wide and 10 inches deep, you know your base can’t exceed these dimensions.
3. **Select Your Base:** Choose a tray, shadow box, or planter that fits within your measured dimensions. It’s better to go slightly smaller than too large.
4. **Sketch It Out:** Grab a piece of paper and draw a rough outline of your base. Start placing your key elements – where will the largest gravestones go? Where might a mausoleum sit? Where will the pathways be? Think about creating visual interest with varying heights and depths.
5. **Consider Scale:** Ensure your miniature elements are in proportion. A giant skeletal figure next to tiny gravestones will look odd. Try to maintain a consistent miniature scale throughout.
Your Step-by-Step Guide to Cemeterrium Creation
Now for the fun part! Follow these steps to bring your spooky vision to life.
1. **Prepare Your Base:** Ensure your tray, shadow box, or planter is clean and dry. If using a wooden tray, you might want to paint it black or a dark, brooding colour for an extra touch of atmosphere. Let it dry completely.
2. **Lay Your “Earth”:** If using soil, gently spread a layer about 1-2 inches deep across the base. If using faux moss, cut and fit it to cover the entire base, gluing it down with your hot glue gun. You can layer soil over moss in some areas for a varied texture. If using sand, mix it with soil or glue it down in patches.
3. **Position Your Main Structures:** Place any larger elements like a mausoleum or a prominent, larger gravestone first. This will help anchor your design. Use hot glue to secure them firmly to the base.
4. **Craft and Place Gravestones:** If you’re DIYing gravestones from craft foam or balsa wood, cut out your desired shapes (rectangles, crosses, obelisks). Use a craft knife to carve in faux cracks or inscriptions like “RIP,” “Here Lies,” or simply dates. Paint them black or a dark grey, and once dry, strategically glue them into your “earth.” Vary their heights by pushing them deeper into the soil or by adding a small riser underneath some.
5. **Add Landscaping Details:** Tuck in miniature trees or branches. Glue down small patches of moss in unexpected places. Scatter black gravel for pathways.
6. **Introduce Your Inhabitants:** Place your skeletal figures. A tiny skeleton emerging from the ground or perched atop a gravestone adds a narrative element.
7. **Weave in the Lights:** Carefully arrange your battery-operated fairy lights. Hide the battery pack as best you can behind a gravestone or under a mound of “earth.” Drape them subtly amongst the gravestones and branches.
8. **Apply the Spooky Touches:** Gently pull and stretch your faux cobwebs and drape them artistically across the gravestones, branches, and figures. Don’t overdo it; a little goes a long way.
Adapting for Small Spaces and Rentals: Spooky Without the Scars
Worried about space constraints or a landlord who frowns upon permanent modifications? No problem!
* **Small Space Solutions:**
* **Dimensions:** Opt for a smaller base like a 6×8 inch shadow box or a narrow, decorative tray.
* **Verticality:** Utilize the height of your display. Use taller, slender gravestones and a miniature tree to draw the eye upwards.
* **Focal Point:** A single, well-crafted cemeterrium can be a powerful statement piece in a small area.
* **Rental-Friendly Techniques:**
* **No Drilling:** Everything should be secured with temporary adhesives like hot glue or museum putty (especially for lighter elements).
* **Removable Base:** Use a tray or planter that can simply be lifted and moved.
* **Faux Everything:** Avoid anything that could damage surfaces. Faux moss, soil, and lightweight gravestones are your friends.
Styling Notes: Crafting Your Chillingly Chic Cemeterrium
Once the structure is in place, it’s all about the styling to make it truly shine.
* **Colour Palette:** Stick to a limited, spooky palette. Blacks, greys, deep browns, and desaturated greens are your go-to. Accents of muted white or bone colour for the gravestones work well.
* **Texture is Key:** Contrast is your friend. The rough texture of faux soil against smooth gravestones, the delicate strands of cobwebs against solid figures, the gnarled branches against the earth – these variations make the display visually rich.
* **Placement for Impact:**
* **Height Variation:** Place taller elements towards the back and shorter ones in the front to create depth.
* **Asymmetrical Balance:** Avoid perfect symmetry. A slightly off-kilter arrangement can feel more organic and unsettling.
* **Narrative Flow:** Think about how a viewer’s eye will travel across the display. Create little scenes – a skeleton creeping, a solitary gravestone.
* **Lighting:** The fairy lights are crucial. Drape them so they catch the edges of gravestones and create an ethereal glow, not just a uniform illumination.
Keeping Your Cemeterrium Tidy (Post-Week One)
The magic of a cemeterrium can fade if it starts looking neglected. Here’s how to maintain that spooky allure:
* **Dusting:** A soft brush or a can of compressed air can gently remove dust from gravestones and figures.
* **Re-Securing:** Over time, things can loosen. A quick touch-up with hot glue will keep everything in place.
* **Cobweb Refresh:** Gently adjust or add fresh cobwebs if they’ve lost their appeal.
* **Tidy the “Earth”:** If using real soil, you might notice some displacement. Gently smooth it out with a small brush or tool.
Common Cemeterrium Fails: Avoiding the Boo-Boos
Even the most enthusiastic decorator can stumble. Here are a few common pitfalls to avoid:
* **Overcrowding:** Trying to cram too many elements into a small space. This makes the display look messy and loses its impact. Less is often more.
* **Inconsistent Scale:** Using miniatures that are drastically different in size. This breaks the illusion.
* **Too Much Lighting:** Blinding your cemeterrium with overly bright or too many lights. Subtlety is key for a spooky, atmospheric glow.
* **Plastic-Looking Materials:** If your gravestones or figures look overtly like cheap plastic, consider painting them or adding texture to disguise it.
* **Lack of Depth:** A flat display where everything is at the same level. Experiment with varying heights and layering.
* **Forgetting the “Grounding”:** If your elements are too light and look like they’re floating, ensure they are well-secured to the base.
Creating a cemeterrium is a wonderfully creative and satisfying way to lean into the Halloween spirit. It’s a chance to craft your own miniature world of gothic charm and spooky delight, a little piece of Halloween that you can enjoy right inside your home, all season long. Happy haunting!
Conclusion
Embracing the unique charm of a cemeterrium can transform your home into a cozy, conversation-starting space. This little touch of the spooky, far from being eerie, adds a playful and curated feel that genuinely makes a difference day to day, offering a delightful visual surprise. Ready to start today? Begin with a single, miniature skeletal figure or a small, aged-looking pot on a bookshelf.
Alternative Ideas:
For a more subtle approach in your living room, consider a spooky-themed throw pillow or a set of black taper candles. On a tighter budget, a few strategically placed plastic spiders on a plant can achieve a similar festive effect.
We hope this inspires you to explore the wonderful world of Halloween decor and organization. Don’t stop here; dive into more ideas to make your home uniquely yours!